Jenni from Jenni20 Designs gets crafty on the cheap. Here's how inspiration struck her and how you can create your own holiday glitter tinsel wreath with things you already have at home.
I pulled out a vintage-style swing coat the other day in preparation for a holiday get-together. (Of course, that's before I realized it was going to be 80+ degrees the first weekend of December.) It is a shimmery, creamy, gold and silvery confection and the second I saw it hanging on the back of my bedroom door*, I had this glitter tinsel craft in mind.
Actually, this is a two-for-one tutorial because you can make either of these glittery holiday decorations using the techniques and materials: 1) the giant Christmas ornament 2) the sparkly holiday wreath.

Materials:
If you're like me, you have a few wire hangers in the back of your closet (I know, cue Mommie Dearest) and an attic and/or garage full of random festive stuff. Add in some scissors and, if you're really industrious, some fancy jewelry making wire shaper thingamajigs, you're all set!
I'm not an actual Mommie Dearest, but I imagine this would be a fun craft to do with kiddos once you've done the prep work and are ready to wrap.
(You can also use variety-store garland. Certain "dollar" establishments around town sell 9ft. of glitter garland for $1. Grab two or three to make the ornament. If you really want to be fancy, a certain Bullseye store sells really plush glitter garland for $6. One package of that will make a really lush wreath.)
 |
| Wire hanger (remove the spongy stuff), plier doo-dads, tinsel garland of choice, and a pair of scissors. |
Steps:
There's really no official way to do this. You just bend and wrap. (Cue Elle Woods.)
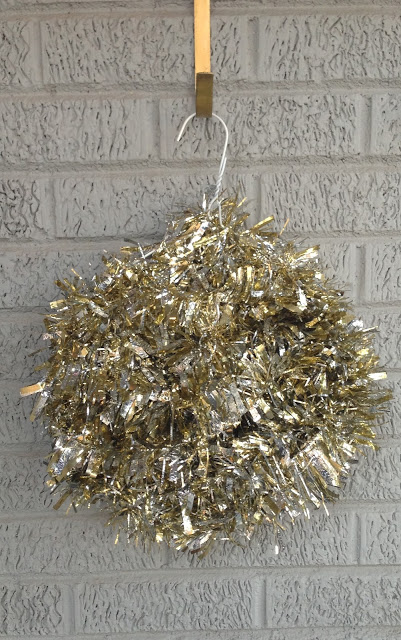
For the ornament, I suggest bending your hanger into a mostly-round shape (the tinsel covers a multitude of geometrical sins!). For your wreath, you can play around with diamond or square shapes, but I found the traditional round wreath was the look for my door.
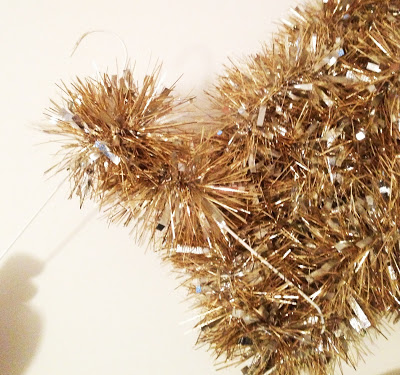
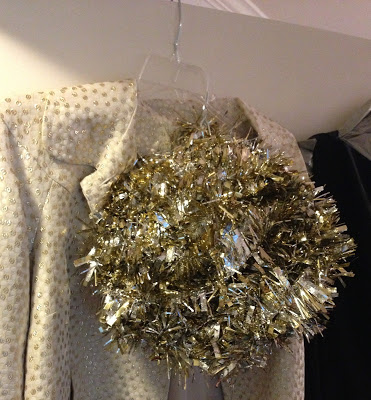
Bend the hanger until mostly circular; you can do this with your hands if you don't have fancy pliers. Leave the curved part--this will become your ornament's hanger.
 |
| (My mom said it would be cute to wrap that part in a silver pipe cleaner--I didn't have any on hand.) |
 |
| I promise it won't look like an acorn when you're finished. |
Starting at the top of the circle, tie a loose knot (gently) of garland/tinsel around the wire, and start wrapping. You'll get into a rhythm pretty quickly and find what works best for you. I found that wrapping the tinsel around each edge of the circle before stringing it to the other side kept my tinsel where I wanted it.
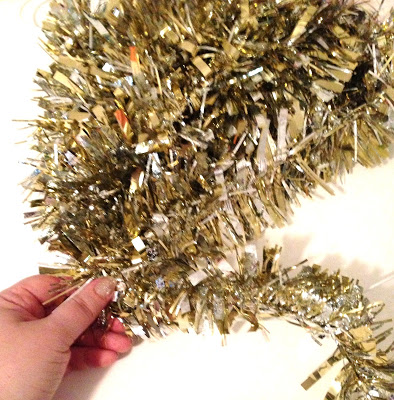
You'll have to fuss a bit with it, but it takes almost no time at all to wrap. When you get to the end of your strand of garland, just tie the next strand to the first and keep wrapping. I used 3 packages of bargain-store tinsel, about 27ft. (!) for this little guy. But that was $3, so I thought that a pretty good deal.
To make the wreath, start the same way: tie your tinsel (gently--you don't want to break it) into a knot around the top of the hanger. I left mine on so I could hang it on my wreath hanger, but you can always bend yours down if you want to hang your wreath with a bow.
And then you start wrapping. Instead of going around both sides of the form, you'll just wrap, and wrap, and wrap all the way around. I counted this as a good arm workout.
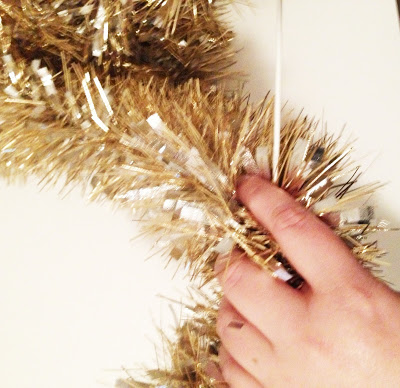 |
| If you have delicate hands, you might want to consider wearing gloves because the tinsel can get pretty itchy after a while. |
Don't worry about spacing it evenly around the circular form; you can always manipulate the tinsel once it's all wrapped and tied off to get the desired effect or cut off a few feet if you think you've got too much.
But my desired effect was a gloriously bushy, rich, and full wreath that is full of sparkle and pizazz, so I didn't cut one inch off.
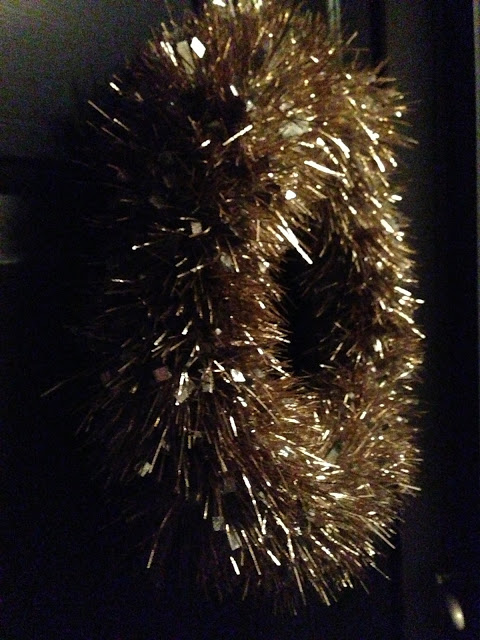
I used the entire package of ridiculously full garland ($6 at the Bullseye store) and I love love how it turned out. I'd love to see how yours turns out!
Use skinny garland for a modern, streamlined look. Hang two or three together for even more flash. I'd also love to see one done up in green with a cute ornament hanging down in the middle of the wreath.
People, you have some wire hangers to repurpose!
Please tweet pictures to our Etsy Dallas Twitter account or post to our Team Facebook Page.
xxoo
Jenni
 |
| *Yes, the hanger was part of the inspiration! |