recycle

Creativity Camp: Basic Shibori Dyeing

Welcome back! This week, we are making over some old white cotton shirts with shibori, a Japanese folding technique to create dyed patterns in fabric. You can use this folding method with any type of modern dye, or the beautiful, traditional indigo vat. For simplicity's sake, we are using Rit Dye on the stove top this time.

Gather your supplies, and keep reading for the tutorial. We need a bottle of dye, half a cup of salt, a squirt of dish soap, a gallon of water in a large pot, tongs, fabric or clothing, and rubber bands/clips/pipe cleaners/popcicle sticks.

IMG_5554.JPG

First, let's do an accordion fold on your item of clothing. Fold your item in half. Then fold the top half back to line up with the edge. Flip over your item and fold the other side back and match the edge again. Now fold the sleeves back. The goal is to make all the edges line up evenly for the next step. (You can stop here, And move on to rubber bands or keep on like the photo.) Now, fold one bottom corner to the edge to make a triangle. Flip the item over, and fold the triangle up along the edge. Flip and fold, flip and fold triangles all the way to the end. 

Use rubber bands, bottle caps, clips, pipe cleaners, and popsicle sticks to create resist patterns. Now let's prepare the dye.

Use rubber bands, bottle caps, clips, pipe cleaners, and popsicle sticks to create resist patterns. Now let's prepare the dye.

IMG_5535.JPG

This part is for adults or older kids. Be careful! Turn your stove on high to boil, and add the salt. Once dissolved, add the dye and a small squirt of dish soap. (We are using black on small items for saturated colors, so we only used half the recommended water.) Reduce your stove to medium heat, and dye your items for 30 minutes.

IMG_5525.JPG

Use your tongs to remove your folds, allowing the dye water to drain as much as possible.

IMG_5524.JPG

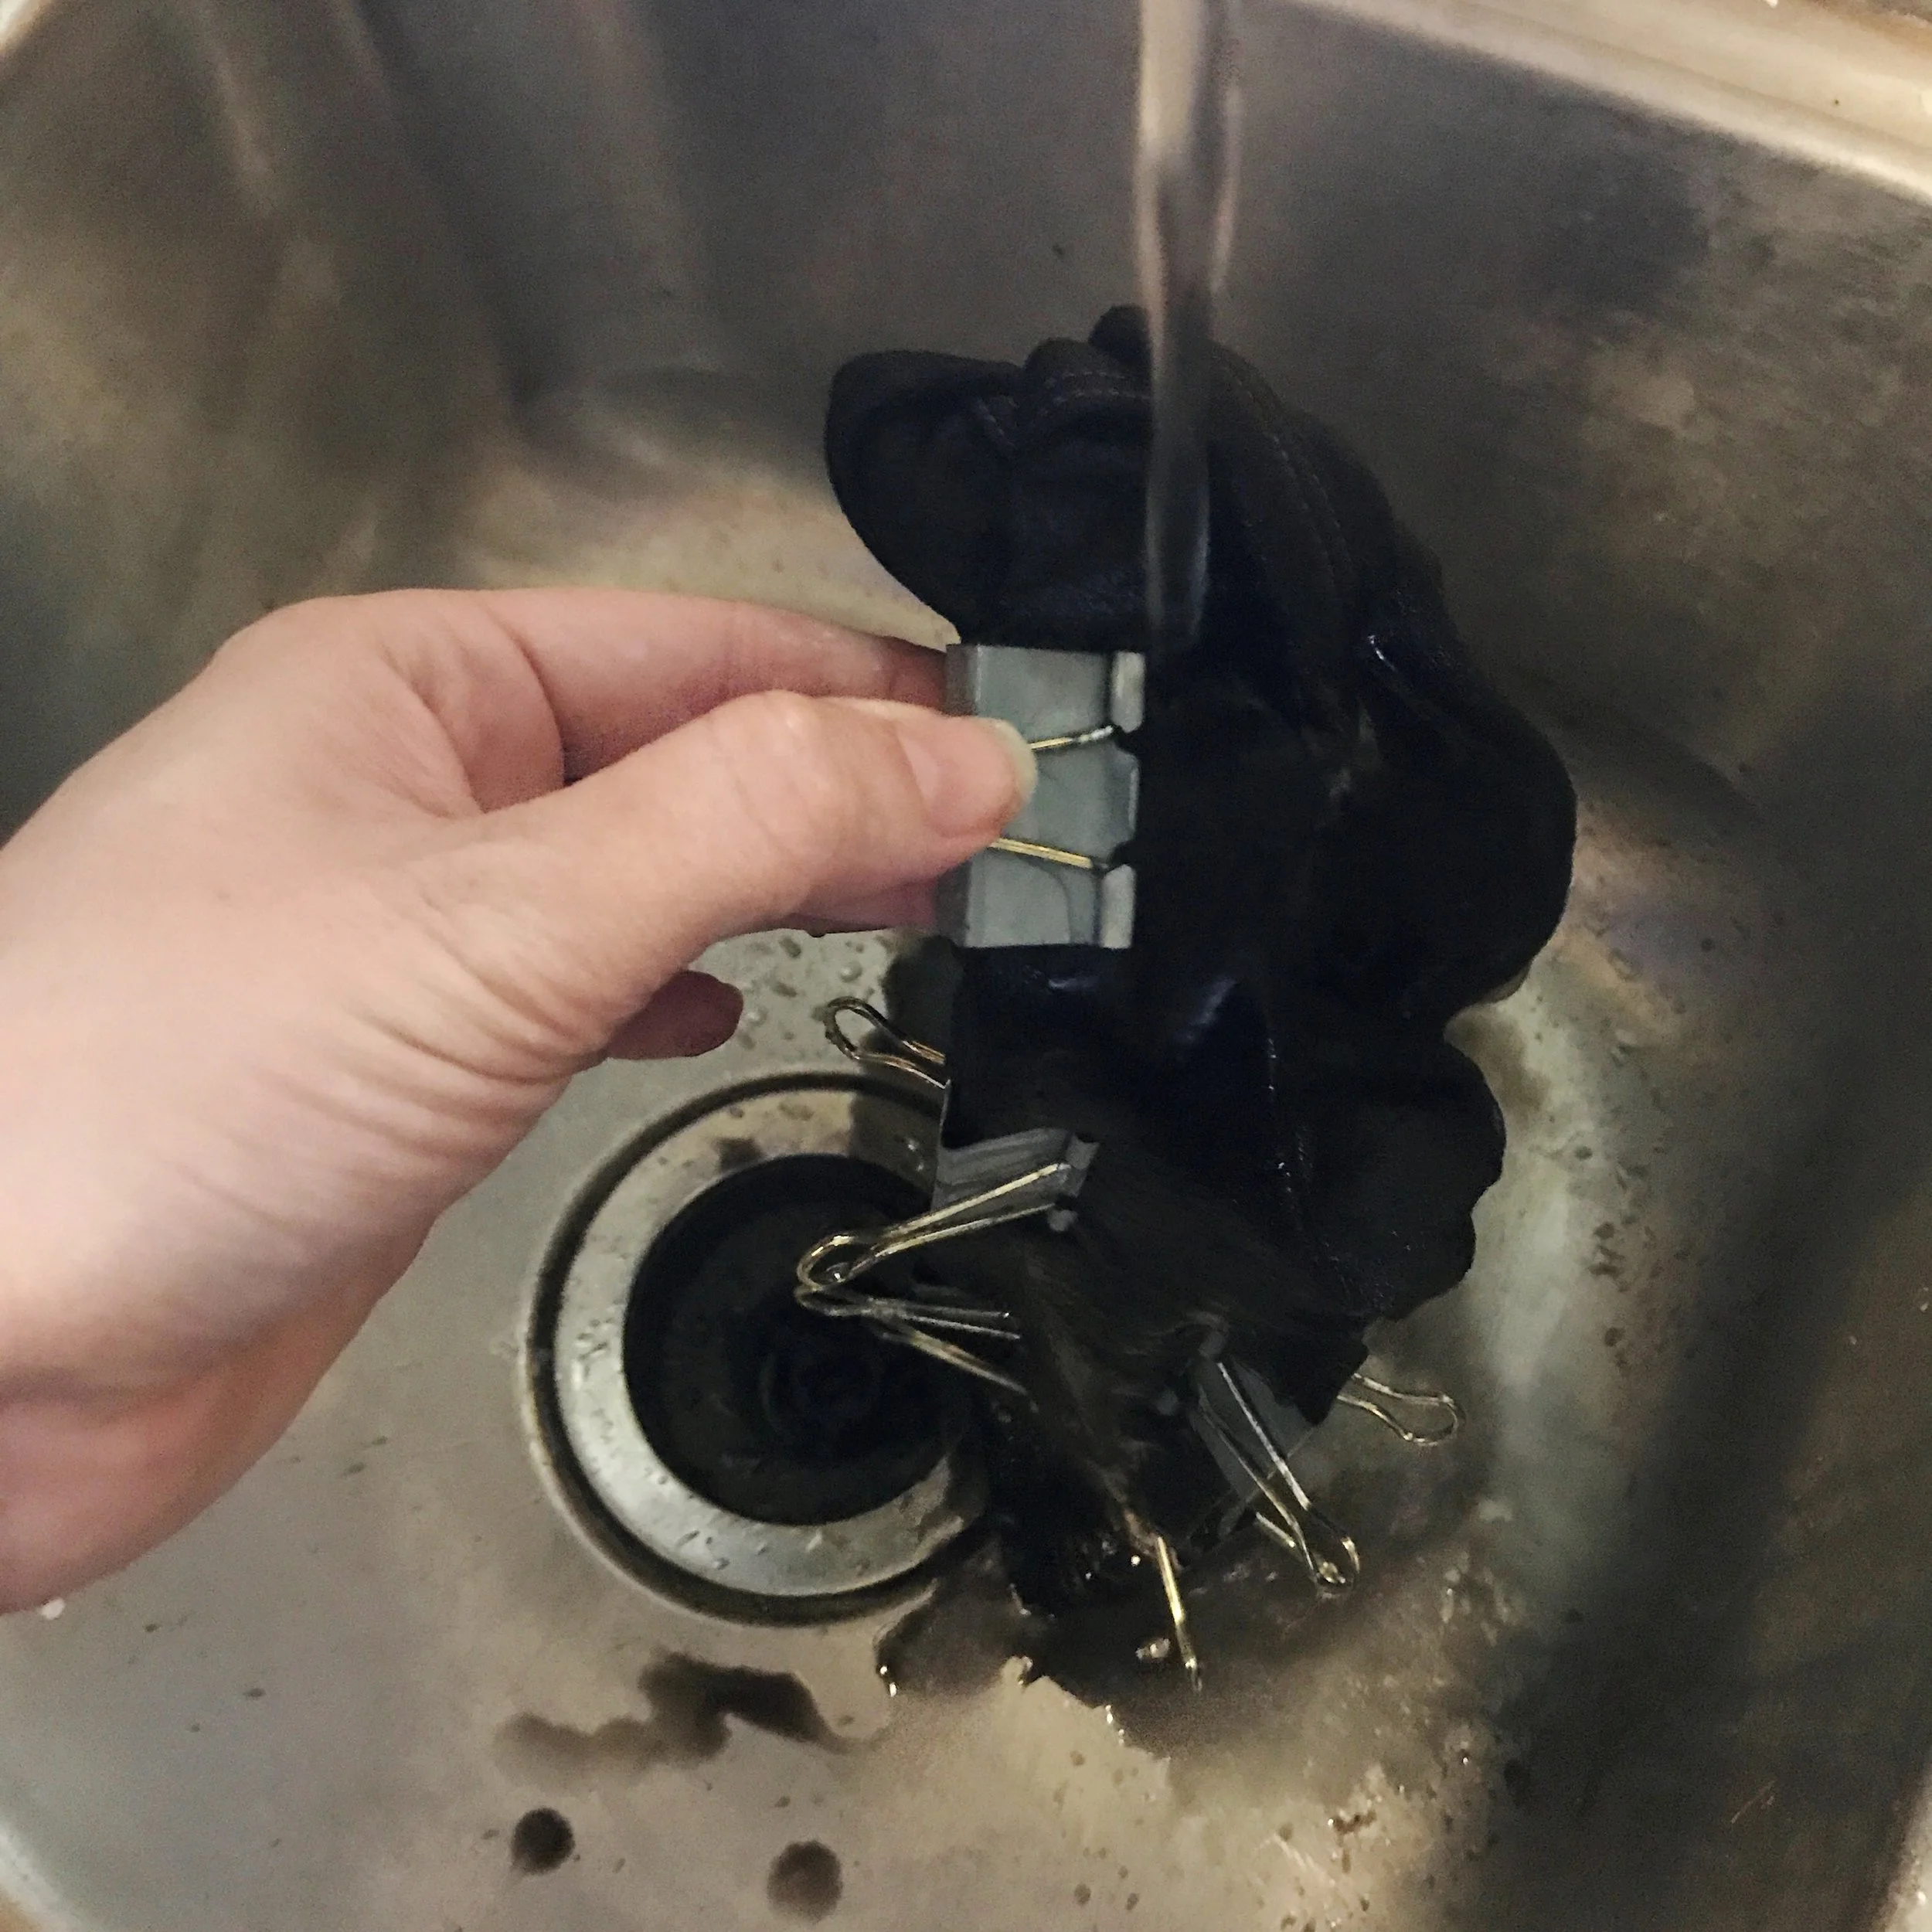
Rinse your items in the sink until the water runs mostly clear, then remove your rubber bands and clips.  (Don't use dye in porcelain or porous sinks, it will absolutely stain! You can take them straight to the washer, but your whites may not be as white.)

IMG_5545.JPG

Wash your items on cold with detergent, and dry them. From left, the patterns are the square accordion fold with popsicle stick resist, the pipe cleaner resist, the triangle accordion fold with bottle cap resist, and the binder clips resist.

I hope you enjoyed this project! Now you can make tea towels, napkins, pillow cases, wall hangings, and all sorts of good stuff! Be sure to tag us @etsydallas #EDCreativityCamp if you try it! 

IMG_5523.JPG

P.S. Use gloves! Lol! 

Creativity Camp: DIY Superhero Costume

Happy Monday! This week's craft takes minutes, and costs nothing. Yes! That is my kind of crafting! It also brings up an important topic with your kiddos... recycling. Getting creative with something old is a wonderful way to recycle. Rummage through some colorful old t-shirts, and grab your scissors. This afternoon, we are becoming superheroes! BOOM!

IMG_4745.JPG

First, use chalk to draw out lines on the back of your shirt, and around the neckline where you will cut. WHACK!

IMG_4743.JPG
IMG_4746.JPG

Next, cut along the sides and those chalk lines. Be careful not to stretch the jersey or the edges will curl. BAM!

IMG_4748.JPG

Now, find the longest length in your remaining fabric, and chalk out a strip for the mask. We used the design from the front of the shirt to create some interest. You can also use the design on the cape instead! SWISH!

IMG_4749.JPG

Cut out the mask, and chalk and cut the eye-holes as well.  Tip: it's easier to cut circles if you fold them in half. BANG!

IMG_4754.JPG

You could stop here, or take it to the next level with a little fabric paint and a sponge.

My daughter came up with a clever super hero name, The Galigator! So, we picked a green shirt, and I cut a sponge into a triangle so she could stamp spikes down the back.   It may help to mark out the design in chalk first to keep things straight. SPLAT!

IMG_4755.JPG
IMG_4741.JPG

Let the paint dry, and your imagination run wild! You are brave, and strong, and bright! KA-POW!

IMG_4756.JPG
IMG_4757.JPG

Thanks for joining us! See you next Monday for another fun project. We would love to see your little superheroes in action, so tag us on Instagram! @etsydallas #EDCreativityCamp

Sponsor Spotlight: The Pig and the Peacock


Etsy Dallas favorites, Sabrina and Jenny of The Pig and the Peacock make beautiful handcrafted soaps, lotions, and candles. Their booth is an aromatic feast, so be sure check them out on Saturday! Look for the huge crowd surrounding these two lovely sisters, smiling and packaging orders, you can't miss them!


Are you debuting any new items at the Spring Bash?
We have made several new soaps that we will introduce at the Bash including Black Currant, Honeysuckle, and Cranberry Salsa. You’ll have to check out our booth to find the rest! We’ll also have some new Spring/Summer scents in our candles.


Do you have any favorite stories from your customers about your products?
I think our favorite story is not from any specific customer, but many people tell us our soaps look good enough to eat, and in fact, it’s true! We have had a couple of people receive our soaps as gifts and take a bite out of them before realizing what it was! 


How has your work evolved since you began The Pig and The Peacock?
Our collection is constantly changing and growing. We have more ideas and designs in our heads than we can possibly ever make so we have started rotating out scents and designs to make room for new ones. We have also added new product lines the past couple of years, like our new lip balms and our DejaVino Wine Bottle Candles.