It is October! If you are the crafty type like me, it officially means you have been scrolling Pinterest for costume inspiration. Well, I have some happy news for you. Etsy Dallas is pulling their creativity together to share a homemade Halloween costume with you every week this month!
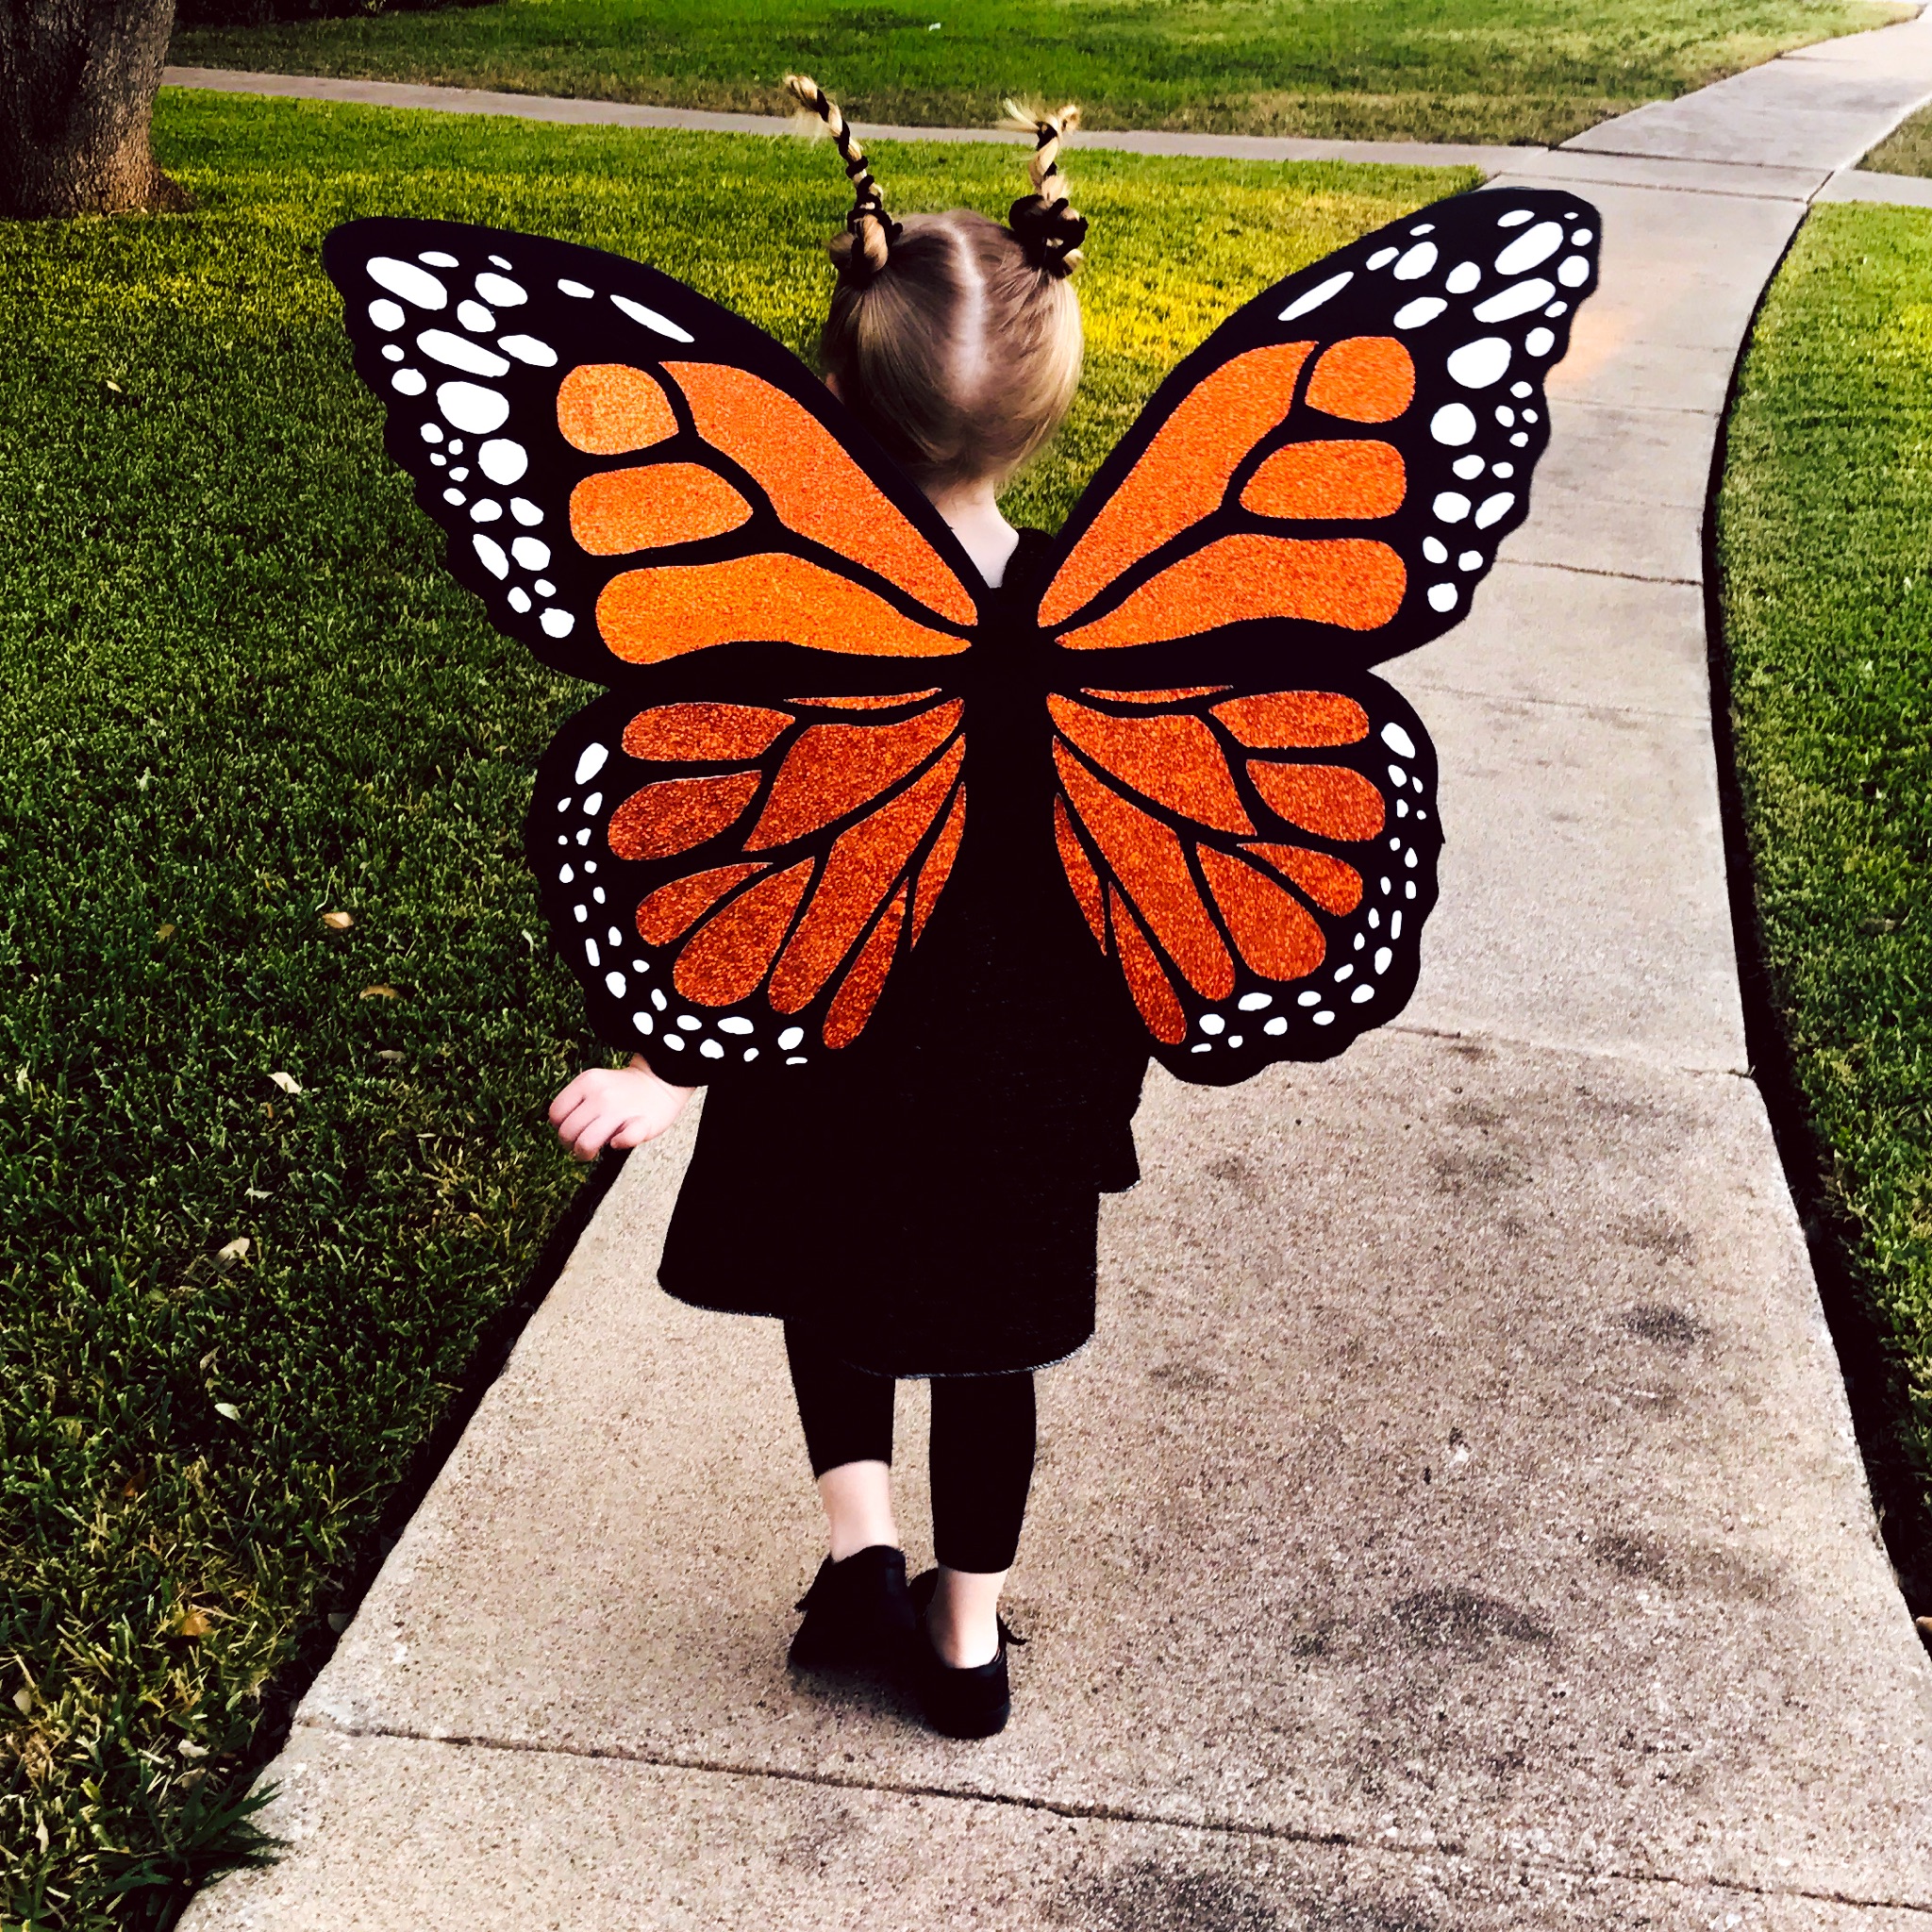
To begin, I’m sharing this show stopping Monarch Butterfly! This was my daughter’s costume last year, and you would not believe how many compliments and responses we had walking down the sidewalk. Some people even crossed the road to get a closer peek. She loved every second of it, and just beamed from door to door.
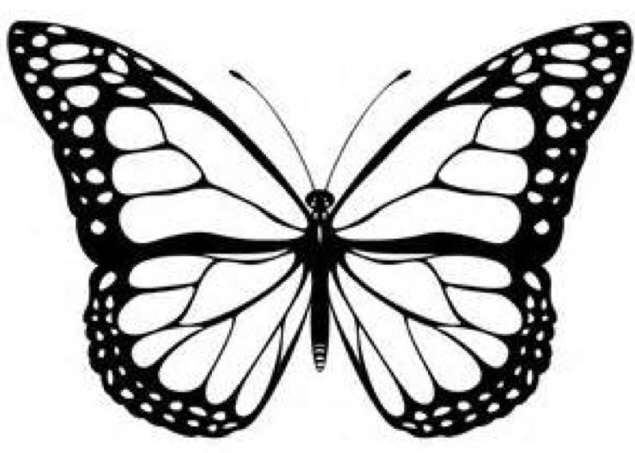
Now, I won’t lie to you and tell you this was fast and easy. It took some time to create, but the end result was so worth it and the supply cost was modest. If you have a Silhouette Cameo, these cut files (orange and white) will speed things up. If you don’t, print this file twice, and stick each to the backs of your scrapbook paper to cut out the shapes by hand. Our butterfly was about 2’ tall and just under 3’ wide.
Here is what you need:
Silhouette Cameo
or Scissors and Patience
4 Sheets Orange Glitter Scrapbook Paper - 12x12
2 Sheets White Glitter Scrapbook Paper - Letter Sized
A Pencil
Glue
4 Black Elastic Headbands
And, this Reference Photo
Here is how you do it:
Use Silhouette Studio to cut out the wing shapes. There is a glitter paper setting, but you may have to play with your settings to get it right depending on the brand and weight of your paper. In the file, I have included the upper wing shapes and lower wing shapes. Cut two of the upper wing shapes. Then move the lower wing shapes to the cutting area, and cut two of those. After those have finished cutting, open the dots file, and cut two using the white glitter paper.
It is a good idea to keep the shapes separated because they add up very quickly. So, use piles or baggies and label them to keep things organized. Once you have separated your shapes, use the reference butterfly to jigsaw the shapes together on top of the foam board like this.

Once you have everything spaced properly, glue the orange pieces down, and lay out the white pieces. This part is a bit tricky, but even if they aren’t an exact mirror, they look real.

Glue those down as well, then use your pencil and reference photo to draw the outline of the butterfly around the pieces. Remember to leave an inch+ border, and add the wavy details! (My pencil outline is a little hard to see in the photo, look towards the bottom left.)
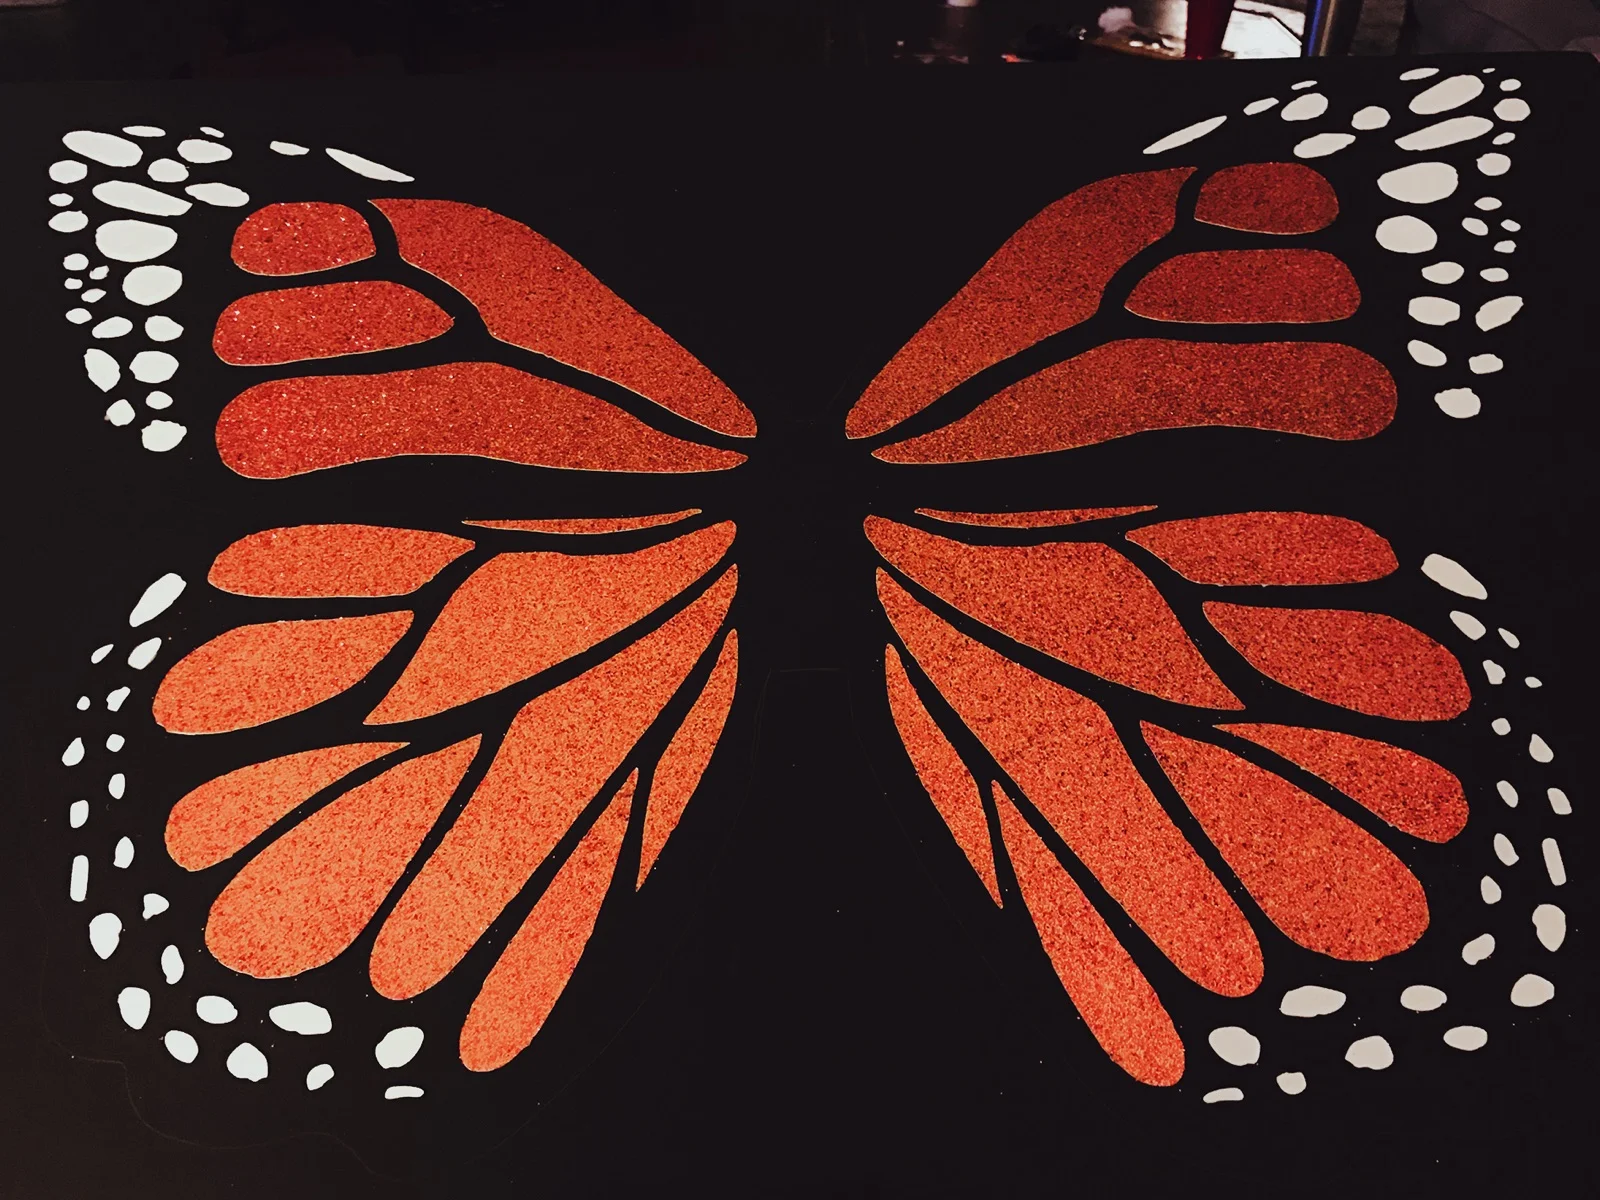
Cut the butterfly outline from the foam board. I had best results with a serrated knife. Follow the steps on the other side with the remaining glitter paper.
Poke two holes in the center top and bottom for the straps. Inserting the knife or scissors and twisting is a good way to do this. Knot the end of two elastics together then string the loops through the hole to make straps. For stabilization, repeat on the second hole.

Pair the wings with a black outfit and shoes, and use pipe cleaners for antennae.
We would love to see your Halloween crafting on Instagram, tag us @etsydallas.I hope to see you back next week for another handmade costume!