craft blast from the past

Craft Blast from the Past: Puffy Paint Candleholder

Welcome to Craft Blast from the Past, brought to you by Esther from estieMade! When I think of craft supplies from my childhood, puffy paint seems like a staple. I remember making many puffy painted shirts from when I was young and even up to my high school days (for volleyball team spirit). I'm no longer glamming up my shirts with puffy paint, but I'd like to show you how an easy way to use it to make holiday candleholders. It's a fun way to dress up table settings during Christmas!

Materials -small jar (I used a mason jar) -puff paint -Ribbon -battery-powered tealight Steps Take your puffy paint and paint on a design. I found the paint came out most evenly when I squeezed the bottle gently. My mason jars already had X's all along the middle, so I just painted on top of these in different colors. I I alternated between a sparkly gold puff paint and a white one, and ended up with this design. Once you're done with your design, let the paint dry, then cut out a length of ribbon that fits inside your jar. You can glue the ends together if you'd like. Place your battery-powered tealight in the jar, and turn it on. Now admire your new candleholder! Hope you enjoyed this Craft Blast from the Past. Good luck with prepping for the Holidays!

Craft Blast from the Past: Washi Tape Magnets

Esther from estieMade bring us another installment in her awesome Craft Blast from the Past series.


Craft Blast from the Past is back! We're focusing on DIY magnets today. Remember making magnets when you were young? It usually involved gluing circular magnets to some kind of art piece we made, or using magnetic tape on the back of a photo. Today I'm going to teach you to make your own with washi tape and magnetic business cards. It's a quick and easy way to spruce up your fridge or office filing cabinet. I got the inspiration from this tutorial.


Materials
-washi tape
-business card magnets 
-cardstock 
-scissors


Steps
Peel the plastic covering off the magnets to expose the sticky side. 

Place the magnet onto the cardstock and press down firmly. Make sure there are no air bubbles between the magnet and cardstock. Then trim off the excess paper.

Place the washi tape parallel to one of the edges of the business card, then use your scissors and cut along the tape line. Lastly, cut the edges of the magnet. You can either do straight cuts, or you can cut zig zags to mimic the torn edges of washi tape.

Since washi tape is so thin, I thought it'd be fun make a couple magnets with colored paper underneath the tape instead of plain white cardstock. I used sheets from a paper sample book I had at home. (If you're in Texas, you can get these books free from Clampitt for free.)

Since I used pastels, the color underneath came out pretty subtle. I like how it adds just a hint of color to the magnet though. 

Like I said, this is a super-quick project. What will you use your washi tape magnets for?

Craft Blast from the Past: Wrapped Feather Pens

Hello! it's Esther from estieMade, with the fourth installment of Craft Blast from the Past. This series is all about taking an old school craft and using it in a new and modern way. The focus today is embroidery thread. Many of us (especially girls!) grew up making friendship bracelets and anklets with this stuff. There were a million-and-one ways to tie the brightly colored strings to make various kinds of bracelets. Now that we've grown out of making friendship bracelets, why not use that to wrap some pens? I found this wrapped feather pen tutorial from idlewife, and was inspired to make my own. Don't know about you, but I still had some floss left over from middle school at my parents' house. The feathers were purchased from Joann Fabrics a long time back. And the pens were spare ones from our drawer. So this was essentially a $0 craft.
steps /1/ Start by taking the gel pen cartridge from the casing. Measure your embroidery thread, making sure you have a long tail (it's better to have more than less!)
/2/ Check to see how the end of your feather fits into the pen cartridge. The feathers I used had ends that were taped with masking tape, which allowed the feather to fit snugly into the cartridge. If your feather end is too thin (i.e. falls into the cartridge), wrap the ends with a small bit of masking tape.    /3/ Tie one end of the embroidery thread around the taped end. Then put fabric or tacky glue all over the taped area, and insert feather into pen cartridge.

/4/ Start wrapping the pen, using the basic friendship knot. You'll want to work towards the pen tip.

Idlewife has this great "how to" video for how to do the wrapping:
 
To change colors, use the existing color to tie a knot to the new colored thread. Hold the old color close to the pen and wrap the new color around both pen and old color.

/5/ When you've reached the tip of the pen, bind off the thread. You can add a little dab of glue to the ends and secure it to the pen.
And you're done! What can you use your feather pen for? I think it'd look neat for signing a guest book at a wedding. Or perhaps for party favors. Maybe they could be just to spruce up your cubicle at work. The sky's the limit on this one!

Hope you will join us at our Craft Party for more DIY fun!

Craft Blast from the Past: Sculpey Doily Bowls

Hello! it's Esther from estieMade, with the third installment of Craft Blast from the Past. This series is all about taking an old school craft and using it in a new and modern way.

Today, we focus on Sculpey. It's a bake-able polymer clay that you can buy at your local craft store. Some of y'all may have used this to make your own beads for necklaces growing up. Or maybe you made a 'plate' with an imprint of your hand on it to give to your Mom for Mother's Day in second grade. Fast forward a bunch of years, and this is what you can do with Sculpey now: make a little bowl for your jewelry. The inspiration for this came from this tutorial from Sodapop design. It’s in German, but the pics are pretty self explanatory. I translated the text using Google translator, and came up with this adapted tutorial. To start, I gathered my materials: bowling3-
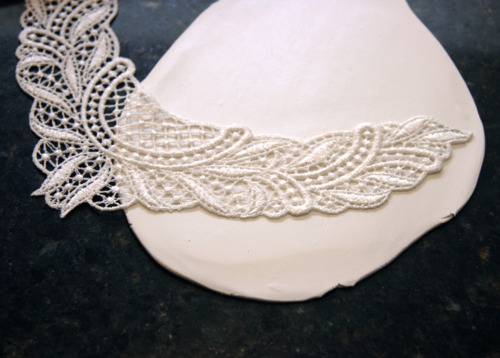
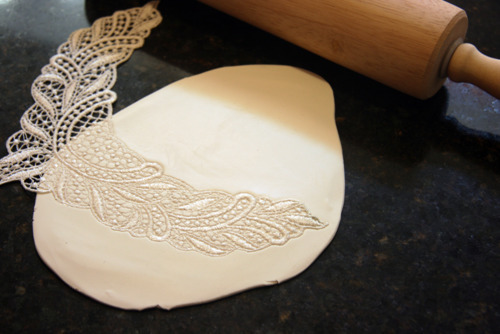
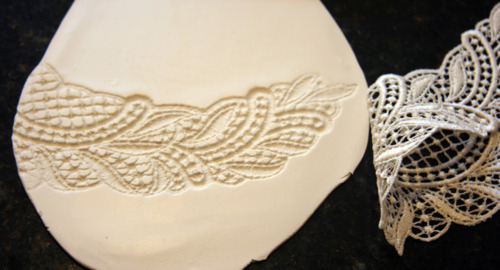
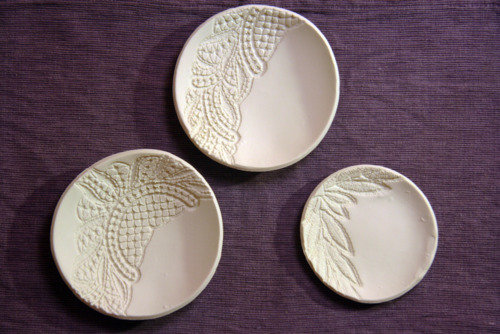
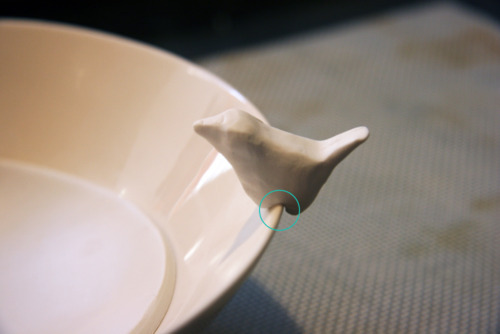
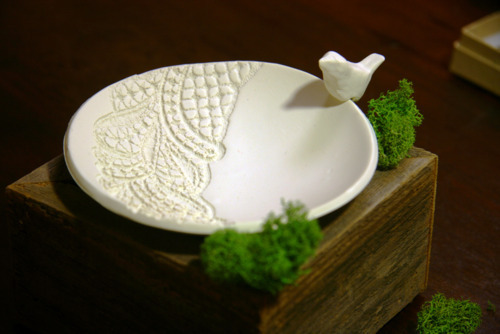
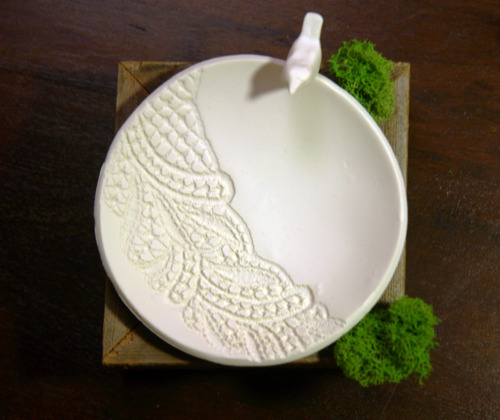
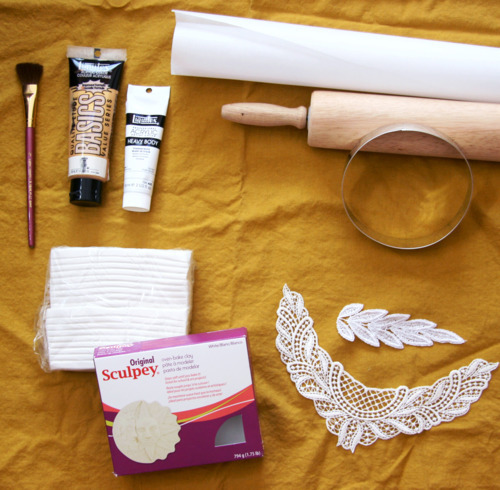
Sculpey clay (I got this at JoAnn Fabrics)
-lace to make your design (a paper doily works fine too)
-a cookie cutter (a cup works fine too)
-rolling pin
-either wax paper or a silipat to roll the clay on
-acrylic paint (optional)

Steps First, roll out the Sculpey onto the Silipat (or wax paper). Make sure you roll the clay out evenly, so that the entire piece is the same depth (about .25"). (By the way, don’t roll your clay out directly on the counter, or you will have to restart. I made that mistake, and couldn’t scrape the clay off the counter without ruining the design.) bowling4
 Then roll the lace into the clay. bowling5
 Carefully peel back the lace. bowling6
 Use your cookie cutter to cut the clay into a circle. bowling7
Next, peel the clay circle off the Silipat, and put it into a oven-safe bowl. I didn’t want the finished bowl to be too deep, so I used a shallow one. bowling 11
The oven-safe bowls went on a cookiesheet, and were baked. I just followed the baking instructions on the Sculpey packaging. After they were done baking, Let the clay cool in the bowls. bowling12
Now for the finishing touches. I ended up making a little birdie to perch on the lip of one of the bowls. To make it easier to glue the bird to the bowl, I cut out a little triangle of clay from the bottom of the bird. This was baked standing up, at the same time as the bowls. bowling9
I attached the little bird I made to the lip of one clay bowl.bowling1 bowling13
On another bowl, painted it with two coats of gold acrylic. Had to use a small brush to do this, for more precise painting. bowling14 bowling15
I ended up using this as my business card holder at last year's Handmade Bash. bowling16
These bowls are pretty versatile – and they look pretty good, for being made out of Sculpey!

Craft Blast from the Past: Glitter Stickers


Hi, this is Esther from estieMade, with the second installment of Craft Blast from the Past. This series is all about taking an old school craft and using it in a new and modern way.

Today, I'm bringing back glitter. We all know it from grade school: tiny squares of sparkly fun that seem to get everywhere. The supplies we used in our younger days were glitter + Elmer's glue + construction paper. And if we wanted to get extra fancy, we'd use the multi-colored stuff!

I've been wanting to make my own glitter stickers after seeing a tutorial on Creature Comforts. Making these is similar to the glitter crafts from childhood, but you use super fine glitter and spray adhesive.

Here's what you need:


You want to use 'extra-fine' glitter. The particles are teeny tiny, compared to regular glitter, which makes the project look more sophisticated when you're done. I found this brand at Michael's; Martha Stewart also makes a line of extra-fine glitter, if you're interested.

Here's what you do:
one
Peel off the outer edges of the sticker sheet, so you're left with just the stickers.


two
You will need two brown shopping bags: one for spraying the glue and one for the glitter. This makes for a super-easy cleanup. Place stickers in one bag, then evenly spray the sticker sheet.


three
Carefully transfer the sprayed sticker sheet to the other bag, then liberally sprinkle glitter on, till the sheet is evenly coated. Then take it out of the bag and let it dry. Once the adhesive has dried, your stickers are done and ready to go!

When I did this, I could still see the sticker designs through the glitter after my first round, so I sprayed and glittered twice. The second round gave them a solid coating, but the downside is that the spray glue solidified into a single sheet and made the stickers hard to separate from the non-sticky area. That meant messy edges on my stickers. It's just something to be aware of.

So now that your stickers are done, you can use them to add a little sparkle wherever you need it! I put mine on cards, including this Mother's Day one (embellished with markings from my pencil eraser stamps.)


The animal stickers were my faves.


I also used the glitter stickers on packaging. It's a nice way to spruce up gifts, goody bags, or Etsy packages.


So there you have it: a quick and classy way to use glitter!

Hope you have fun, and stay tuned for next month's Craft Blast from the Past!

Craft Blast from the Past: Eraser Stamps

Hi, this is Esther from estieMade, kicking off a series called Craft Blast from the Past. The series is all about taking an old school craft and using it in a new and modern way.
Today's topic? Turning erasers into stamps! Remember how we used to use potatoes in grade school and carve them into stamps? Well, this is pretty much the same thing, except you use erasers instead of potatoes. This is a easy and cost effective way to spice up a card (Mother's Day is coming up), gift wrap, or packaging. Plus, you can reuse the stamps you make for a long time. To make your stamps, you will need: 
-no.2 pencils with new/unused erasers 
-X-acto knife 
-ballpoint pen 
-stamp pads 
-paper, or something else to stamp on 
-a damp paper towel

step one Take your ballpoint pen, and draw out the desired stamp shape on your eraser.
I made a triangle and a heart. *I also tried doing this on the big white eraser you see in the images above, but it didn't work out for me. The erasers were too porous for the stamp pads I had, and the shapes that I stamped out looked more like blobs than hearts. Perhaps I should try with a larger design or a different kind of eraser next time.

step two Using your x-acto knife, carefully cut the excess eraser away, leaving just your shape.
You'll want to cut down to the base of the eraser, where the metal piece is. I made the heart by cutting right angles to get the general shape, then shaving down little pieces of eraser to give it a more rounded shape.

step three Admire your fancy work. Then bust out the stamp pads. It's time to go stamp happy! Make sure your damp paper towel close by, so you can wipe off the stamps when you switch colors.

I ended up making a bunch of different patterns using my stamps, then went back with a Micron pen to add accents. I thought this one (below) would make a cute name card for a dinner party. (Or in my case, a tea party that has pb&j.)
So there you have it – the first Craft Blast from the Past. The more you use the stamps, the more ideas you come up with. I promise!

If you're interested in seeing more tutorials, stop by my blog.